An ingrown toenail is caused by pressure of the nail against the skin on the side of the nail. Prolonged periods of pressure can cause irritation of the skin, swelling, infection, and pain. Ingrown nails are seen mainly in the big toes of people in industrialized nations. People in cultures that don't wear shoes rarely get ingrown nails.

Causes of Ingrown Toenails
There are several factors that can lead to an ingrown toenail. The first is an abnormality of the soft tissue on the side of the nail. Certain rare diseases can cause a laxity of the skin, but the most common soft tissue abnormality is that seen with tight-fitting shoes. The shoes cause overcrowding of the toes pushing the soft tissue against the edge of the nail. Another common factor that can lead to ingrown toenails is nail abnormalities. Improperly cutting the toenail, cutting it short and curved, can cause the nail edges to turn in. Certain conditions such as lung disease, advancing age, and poor circulation in the extremities from blocked blood vessels can cause the nail to curve. Other less common factors that can lead to ingrown nails are bone spurs under the nail, trauma to the nail, multiple infections, and drugs such as indinavir.
Appearance of Ingrown Toenails
There are three stages of ingrown toenails.
1-In the first stage the skin on either side of the nail is red and painful to the touch. This is due to inflammation or irritation only - not infection.
2- In the second stage the skin is infected and may bulge over the side of the nail. The affected area may ooze clear fluid or pus.
3- In the third stage the skin has been infected for a prolonged time and is trying to heal itself. The skin does this by forming granulation tissue. This is heaped up extra red tissue that bleeds easily and migrates over the nail edge.
Diagnosis of Ingrown Toenails
Ingrown toenails are diagnosed clinically by their appearance. If pus is present, it may be cultured to determine the bacteria involved, but this is not always necessary. Infections that involve the bone or joint space may need to be ruled out with an X-ray, but this extent of infection is rare.
Treatment of Ingrown Toenails
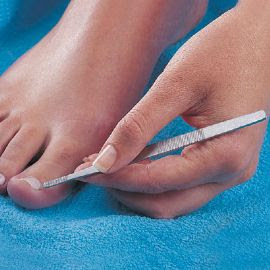
Ingrown toenails are treated based on the stage involved. Toenails in stage 1 can be treated with warm soaks, a cutout shoe, and by elevating the nail with a cotton swab. Symptoms improve after a couple of days, but may not resolve for 2 to 3 weeks. Toenails in stage 2 can be treated with warm soaks and oral antibiotics. Closed-toed shoes and hosiery should not be worn for at least 1 week. If the toenail is especially painful, a portion of the toenail may need to be removed. This is done in the office under local anesthesia. Toenails in stage 3 need to be treated with partial or full toenail removal. For recurrent instances of ingrown nails, the nail bed can be ablated. This is done by placing phenol on a cotton swab and inserting it under the cuticle remaining after the nail has been removed. The phenol kills the matrix cells that make the nail plate.
Diabetics and Ingrown Toenails
People with diabetes must pay close attention to their feet. Diabetics can develop peripheral neuropathies and loose the sensation in their feet. They are also predisposed to getting unusual infections because of the changes in their immune systems. Finally, diabetes can cause the toenails to thicken and curve under leading to ingrown toenails. For all of these reasons, people with diabetes should report any redness around the toenails to their health care provider even if they don't have pain. Diabetics with thickened toenails should see a podiatrist to have their nails trimmed under antiseptic conditions.
Hope you you enjoyed reading my post & found it
useful
You may be also interested in


